We may earn money or products from the companies mentioned in this post.
Introduction

When it comes to walker safety and stability, there are a few key factors to consider Not only does this play a crucial role in reducing falls and injuries, but it also enhances the mobility of seniors and disabled individuals One simple yet effective way to improve the stability of a walker is by adding tennis balls Let’s explore the benefits of this small but impactful modification
The Importance of Walker Safety and Stability
Walker safety and stability are paramount for individuals who rely on these mobility aids By ensuring a secure and stable walking experience, the risk of falls and injuries can be significantly reduced This is particularly important for seniors and disabled individuals who may have balance issues or difficulty maintaining their footing
Benefits of Adding Tennis Balls to a Walker
Adding tennis balls to a walker can offer numerous advantages that improve its functionality:
-
Improved Traction on Various Surfaces:
Tennis balls provide better grip and traction on different types of surfaces, including carpeted floors, tiles, or outdoor pathways This enhanced traction helps users maintain control while walking with their walkers -
Reduced Noise While Using the Walker:
The rubberized material of tennis balls acts as a buffer between the metal legs of the walker and the ground This reduces the noise generated when moving the walker, making it more discreet in quiet environments such as libraries or hospitals -
Protection of Floor Surfaces from Scratches:
The smooth surface of tennis balls prevents them from scratching hardwood or laminate flooring By adding these protective caps to each leg of the walker, users can confidently move around without worrying about damaging their home’s floors
By incorporating tennis balls into walkers, users can experience improved stability, enhanced traction, reduced noise, and protection for their floors These small modifications can make a significant difference in the overall safety and convenience of using walkers for seniors and disabled individuals
Materials needed for adding tennis balls to a walker

Adding tennis balls to a walker can greatly improve its mobility and maneuverability With just a few simple materials, you can transform your standard walker into a smoother gliding aid Here are the materials you’ll need:
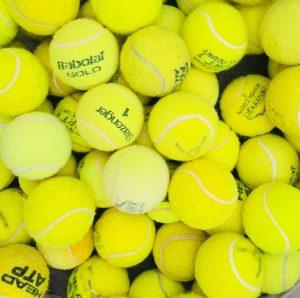
Tennis balls
Tennis balls are the star of this DIY project You have two options when it comes to tennis balls – new or used If you have some old tennis balls lying around, they will work just fine However, if you prefer a fresh set of tennis balls, they are readily available at sporting goods stores
The number of tennis balls required depends on the number of legs your walker has Most walkers have either two or four legs, so make sure you have enough tennis balls for each leg
Cutting tools
To properly attach the tennis balls to your walker, you’ll need some cutting tools A sharp knife or box cutter is essential for creating an opening in the tennis ball that will fit snugly over the walker leg
If you prefer a more precise cut, you may also want to have a pair of scissors on hand as an optional tool
Marking tools (optional)
While not necessary, marking tools can be helpful in ensuring accurate cuts on the tennis balls A pen or marker can be used to mark cutting lines on the surface of the ball before using the cutting tools
By gathering these materials and following a few simple steps, you’ll be able to add tennis balls to your walker and enjoy improved mobility wherever you go!
Step-by-step guide to add tennis balls to a walker

Are you looking for a simple and cost-effective way to make your walker glide smoothly across different surfaces? Adding tennis balls to the legs of your walker can provide that extra mobility and stability you need In this step-by-step guide, we will walk you through the process of adding tennis balls to your walker
Preparation process
Before starting the process, it’s important to gather all the necessary materials in one place This includes four tennis balls, a pair of scissors, and your walker Once everything is ready, ensure that the surface where you’ll be working on is clean and flat This will make the installation process much easier and more efficient
Cutting the tennis ball(s)
To prepare the tennis balls for attaching them to the walker legs, take a pair of scissors and create an X-shaped incision on each ball This incision will serve as an opening for easy insertion onto the legs of your walker Be careful not to make the incisions too wide, as it might compromise their grip on the legs
Inserting the tennis balls onto the walker legs
With the X-shaped incisions made on each ball, it’s time to attach them to your walker’s legs Align each leg with its respective opening on one of the tennis balls and push it firmly into place You should feel a secure attachment once properly inserted
To double-check if everything is securely attached, wiggle each leg slightly If they don’t come off easily or feel loose, congratulations! You have successfully added tennis balls to your walker
By following these simple steps, you can enhance your walking experience with a smoother glide across various surfaces using just a few tennis balls Say goodbye to those frustrating moments of struggling with your walker and enjoy the newfound ease and stability it provides
Tips, Tricks, and Maintenance Recommendations for Walkers with Tennis Balls

Choosing high-quality tennis balls:
When it comes to using tennis balls on walkers, selecting the right ones can make a world of difference Opting for durable and non-deflated balls is essential in providing long-lasting support These sturdy balls will effectively absorb shock and provide stability while you walk So, remember to invest in high-quality tennis balls that won’t deflate easily
Replacing worn-out tennis balls regularly:
Just like any other piece of equipment, tennis balls used on walkers can wear out over time It’s crucial to keep an eye out for signs that indicate they need replacement Excessive wear and tear or a lack of grip on surfaces are clear indicators that it’s time to swap them out By doing so, you’ll ensure optimal performance and prevent any mishaps during your walks
Cleaning and maintenance of tennis balls and walker legs:
To maintain the effectiveness of your walker’s tennis balls, regular cleaning and maintenance are necessary Performing routine check-ups will help ensure cleanliness as well as proper function Cleaning the tennis balls themselves can be done using mild soap and water – simply give them a gentle scrub to remove dirt or debris Additionally, don’t forget to inspect the walker legs for any signs of damage or need for lubrication
Customization options for added personal flair:
If you’re someone who loves adding a personal touch to everything you own, why not customize your walker’s tennis balls? There are various ways to do this – from using colored tennis balls to decorate them according to your preferences or even employing markers for more intricate designs This simple customization option allows you to express your unique style while maintaining functionality
Useful Links

Top Glides Precut Walker Tennis Ball Glides (Red)
4 Tennis Balls For Walkers (And Alternatives)
How to put a tennis ball on a walker – Step-by-Step Guide
Walker Glide Replacement Tennis Balls, Pair
Skis, Wheels, or Balls: What Are the Best Feet for Your Walker?
What are the pros and cons of attaching tennis balls …
Medline Walker Tennis Ball Glides
How To Put Tennis Balls On Your Walker at Theresa …
AHS Walker Tennis Ball Glides | American Hospital Supply
Why Are Tennis Balls Used On Walkers?
Why Tennis Balls on Walkers are Dangerous
How to cut and add tennis ball for walker
Therafin Walker Tennis Ball Glides
Walker Tennis Balls – Tennis Ball Glides
Walker Tennis Ball Glides
【How to】 Put Tennis Balls On A Walker
5 Alternatives to Tennis Balls for Walkers – Growing Gray USA